
Step by Step on Oyster Mushroom Cultivation
Oyster mushroom can be cultivated under local conditions using simple production techniques. It does well in a wide range of substrate, has a unique taste and high nutritive value.

Growing house and incubation room
A lot on these was covered in the previous post which you can find here. You could use locally available material to maximize on profits or put available farm structures to use. We built a small mud walled, grass thatched structure of 8m by 3m to start with. The house is divided into three rooms; spawning, incubation and growing room.
The incubation room must be dark, cool and dry with temperatures of between 25 to 280C. During fruiting the room should be kept humid with temperatures of between 18 and 230C and humidity between 65 and 95%. You can achieve this by spraying clean water on the floor at least three times a day or by placing water filled pots in the growing room.
The size of the house depends on the number of bags you want to handle. Place your windows on the upper side of the room. The windows should not be very large. E.g. it is recommended that for a 10 ft x 10 ft house, the windows be 1 x 1” in opposite directions. This is to allow fresh air and light in to the growing room. Construct wooden shelves for placing the bags or racks for hanging tubes. Remember, 45 cm from the ground, 45 cm between shelves and 45 cm from the roof.
Steps in oyster cultivation
1. Selection of substrate material
The different types of substrate are covered in detail under Production plan and basic requirements. Wheat straw is preferred because it facilitates quick colonization of the substrate. Oyster does not require composted substrate because this reduces yield.
2. Substrate preparation
- Shredding
This is the process of cutting the straws (of the substrate) into small pieces. You can use a panga, chaff cutter or any other available cutting tool.
N/B: If saw dust is used, it has to be from hard wood, should not be colored, should have good acidic content and must be composted for at least a month.
- Soaking
Immerse the substrate in a drum of water and drench. Soak for 6-8 hours overnight.
Heval Farms method; at Heval Farms, we use baggasse and maize cobs as the main substrate. Our measurements are 40 liters of water per drum and we soak the maize cobs only. To this water we add 1 mug of lime and 1 mug molasses.
- Draining
Drain the excess water from the substrate and ensure 70% moisture content. This is done by squeezing the substrate in your hands. It should give 2 to 3 drops of water. If there are more drops, continue draining. If there are fewer drops, add water.
Heval Farms method; since maize cobs absorb just enough water over the 8 hours of soaking, we pour out the water into a large basin and spread the maize cobs over a polythene sheet. We then add baggasse and mix thoroughly. The water that was used to soak the maize cobs (remember it contains molasses and lime. More on that later) is then poured on to the substrate, a little at a time, as we check for the right moisture content.
- Supplementing
Supplements are added to increase nitrogen content. Supplements include molasses, wheat bran, cotton seed cake, and millet or soya meal. Lime is added at 1% of wet weight of the substrate. Lime is a buffer which means it adjusts the pH of the substrate. Mix everything thoroughly.
Heval Farms method; all we add at this stage is the wheat bran since we had already added lime in the soaking water.
- Decontamination
Decontamination can be done using either sterilization or pasteurization. We will focus on the later.
- Pasteurization
- Steam method
- Pack the substrate into polybags and compact slightly to avoid air spaces
- Insert 1’ PVC pipe in the open end and close the pipe with some cotton wool
- Put the substrate bag into a bigger polybag and close with a rubber band
- Alternatively, pack the substrate in the first polybag and close it with a rubber band directly. (this is the method we use)
- Put water in a 200 litres drum up to a depth of about 8 inches
- Place a wire mesh or wooden rack 9 inches from the bottom of the drum
- Line the drum walls with gunny bags (gunia) or cotton linen to prevent direct contact between the poly-bags and the drum walls.
- Pack the bags vertically in the drum to allow even steam circulation
- Cover the drum tightly with a poly-sheeting or lid. Perforate two holes on the cover to allow steam to escape.
- Pasteurize by heating and maintain 600C temperature for 4-6 hours. Only start timing after you observe steaming.
- After 4-6 hours, stop heating and allow poly-bags to cool.
")
- Pack the substrate into a suitable gunny bag and tie tightly.
- Put water in an oil drum, just enough to immerse the substrate completely.
- Immerse the gunny bag into the water and suspend it on a piece of wood or rack at the bottom of the drum.
- Raise the temperature up to boiling and maintain it for 1 hour.
- Remove the bag and suspend it in a sterilized room with minimal air movement to drain excess water and cool.
- Pour the substrate in a sterilized room and let it cool
Congratulations! You are done with the hard and laborious part. Now to the most delicate part of this process; spawning.
3. Spawning
After the bags have cooled, it’s time to spawn. This is best done in a sterilized spawning room. The room is sterilized by cleaning and spraying Methylated spirit in the air.
- Stir the spawn (seed) with a sterilized rod to loosen the spawn in the bottle. You can also gently knock the bottle on a rubber material or, if the spawn is in plastic bags, pressing the bag lightly between fingers.
- If you decontaminated using steam method:
Pour a little of the spawn into the inner bag through the PVC pipe or open the bag and pour in the spawn and mix well with the substrate using the sterilized rod.
Insert the PVC pipe to the open end and close with clean dry cotton wool. If you used two bags, the outer bag is rolled open to a few inches down below the neck of the inner bag.
- If you decontaminated using immersion method:
Apply spawn which should be 4-6%wet weight of the substrate.
Mix thoroughly to ensure even distribution
Put the seeded substrate into perforated polythene bags and tie tightly or alternatively introduce a breather (the PVC pipe closed with cotton wool)
In both cases, the spawning rate is 4% w/w (weight of spawn to wet weight of substrate. 1 liter spawn can be used for 10 bags of 2.5kg each. If wet weight of substrate is 50kg, add 2-3kg spawn.
4. Incubation
Place the spawned bags in an incubation room. Remember, the incubation room should be cool, dry and dark. This stage of mushroom growth does not require light.
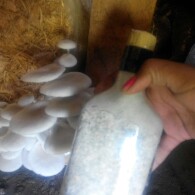
The incubation period takes around 28 days. Within this period, the spawn will have colonized the substrate and the bags will turn white. If you get any colour other than white, either colonization did not take place or the substrate was contaminated during previous processes.
Pro tip: Use these 28 days to do some really aggressive market search and reassure your already found market that your product is almost ready. Keep checking on the mushroom to ensure everything is going well so you don’t disappoint your clients in the last minute.
Remember, don’t be too ambitious. Work within reasonable figures from research and find a market you can satisfy.
Our next and final post on oyster mushroom production process will cover transfer to growing room, pinning, harvesting, grading, storage and marketing of the final products.
It is our hope that this post has and will be of help to you even for future reference. Do you have any queries or comments? Feel free to leave us feedback or contact us.
Happy successful farming!
CREDIT: Heval Farms
